Thursday, May 24, 2007

Tankless Water Heater

I just read on the boards some questions on tankless water heaters. I installed a unit last year. Here is a cut and paste of the beginning of that ordeal from my everyday blog....

Cutting Gas Lines
Wednesday, June 07, 2006

Monday was internet shopping day for me. Researching the differences between tankless water heating systems I found a great Memorial Day sale that ended midnight on the 5th on a good system. (http://www.designerplumbing.com/store/TAKAGI03.html)

After I ordered the thing I downloaded the instructions. I decided on doing an external installation. The venting of these systems is tricky, and the venting kits can really run into money. Being in Alabama I don’t have to worry about freezing temps. It is supposed to be safe to 5 degrees. It VERY seldom gets that cold here. Going through the instructions I realized where I originally was going to put the thing will not be to code. The vent has to be four feet away from any window or door opening. That is what my entire house is: windows and doors! I will be able to put the heater on the back wall by the shower and be to code.

This is turning out to be one of those classic “mushroom projects.” That is when a simple job grows way out of proportion. It just keeps mushrooming!

Because of the new location of the installation, the gas line will have to run about 40 feet from the meter. The fittings added to this feeder line will also slow down the gas flow. With all this in mind the supply gas line has to be 1” in diameter. The place where I planned on tapping into the gas line at the meter is ¾ inch. To remedy this I had to switch out the Tee fitting from the meter to 1”. A simple job? Not on your life!

To do this entailed cutting the two pipes, one pipe was 1” and the other was ¾” coming off the tee. These pipes were removed, and then the Tee was switched out. This all had to be done in the crawl space with not a lot of room to move around.

While doing this I removed more pipe work to simplify the gas runs. There were gas runs backtracking all over. Now the current hot water tank, gas fireplace, stove and gas dryer all come off one main gas line. The main cut line had to have a union installed.

Finally I had everything back together by 7:30. The gas was turned back on and all the connections were tested with soapy water. If there is any leak the soap will bubble up like crazy. It all passed inspection!

This tank requires the water intake come from a ¾ line. When they replumbed my house with copper tubing I think they got the pipe from a remnant store. The main supply lines go from ¾ to ½ and then back to ¾. This has a great effect on the water pressure. Just think of a highway that has a set amount of traffic that goes from two lanes to one, and then back to two lanes again. Here is a picture of what I have to contend with. Every branch off the main water lines to supply the sinks, toilets, and tubs is a conglomeration of tiny bits of copper pipes sweated sloppily together. This mess has been a bone of contention to me since I bought the house 10 years ago. Pretty much everything will have to be redone.

That is where I stand today. Central Plumbing is just around the corner; they will be seeing my mug when I go there to get 1” galvanized pipe today. I will run the new line to where the tank will be installed and cap it off. Then gas line work will be finished and I can dig into the water lines.

All the while I was fussing with the galvanized pipe I was thinking of my dad. He taught me how to work pipe wrenches, measure and cut pipe, and most importantly the right way to thread pipe.

Dad was taught by his Uncle Joel, who was a second father to him. “Uncle Joe” was a craftsman when it came to plumbing and carpentry. He taught dad skills and dad passed that knowledge on to me. Poor dad, I can still hear him lamenting how I would be handicapped for the rest of my life because I was left handed.

While I was working using Dad’s old thread cutting dies and pipe vice: threading that galvanized pipe, I knew he was looking over me with a smile.

I always felt I was such a disappointment to him because I was never interested in team sports. Growing up I’d hear how so and so’s son on the football or baseball team did so well at the game. In time, many of these stars turned out to be real losers: I know dad took pride in what I accomplished on my own.

Dad died too young at 67. When he was dying in Buffalo General we were talking about how I hated painting the backyard picket fence. There was never any question about me not doing it. I was told to do the job and I did. The fence was divided off into sections; I’d try to get one section done a day. This was oil based paint back then. It was such a pain to work with, when I was done for the day the brushes had to be totally cleaned out in gasoline. When dad would come home from he would inspect my progress for drips and runs. Oh how he would rant and go on if I screwed up. Today this would be called abuse. Looking back, it was a learning experience that set my standards higher than a “half assed” job.

Poor Dad lamented that he was too hard and would always remember that as such a bad time. I think I was able to convince him that I was thankful he cared enough about me to put me through that. Because of that early training I always try to do the best job I can. “If you can’t do a job right, don’t do it all.” was one of Dad’s favorite sayings.

Dad was not a perfect father. That person does not exist, but he did the best he could and he loved his family. You can’t ask for much more than that.

Friday, March 23, 2007

Latest Project....tool shed addition

One of the big projects last summer was “Pergola/patio that was installed on the west end of my workshop. While all that was going on, I poured a cement pad for a small addition to be added to the shop. This was to be for my garden tools. I was getting itchy for an “outside project” so I began work on this addition on Wednesday.

This side of the workshop faces north. It is always in the shade. I installed a new doorway and poured a cement pad to this back in 1999. There was a great deal of rotten siding that had to be replaced. I think there is some source of water in this area. The cement floor in the workshop on this side is always damp. Here it is only eight years after the fact and again I have to replace rotted siding. About three feet going from the bottom up of the siding is removed. The bottom three boards are pretty well trash. The rest is not in that bad shape. A piece of 23/32 sheeting is installed where the siding would be inside the new garden shed. From the outside of the shed to the edge of the workshop, the removed siding is fitted in. The bottom-most piece is coated on the back with Minwax Wood Hardener. Hopefully that will help stop the capillary action of water soaking into the wood.

I have a pretty general idea how this is supposed to all flow together. The first job in the framing department was to anchor the sill plates to the foundation. When I poured the cement last year, bolts were put in place for this task. It was a simple job to measure, cut, drill and install the pressure treated lumber.

From here it is just putting up the framing. This is a bear of a job to do solo. It is up and down the ladder, measuring, cutting, leveling and nailing for pretty much the whole day.


It is not till I get pretty well finished with the framing of the walls that I figure how I will install the roof. I will scab this shed roof onto the existing garage roof. The same roof I redid last summer! UGH!! I will have to add a little bit to the headers to raise the height so the new rafters will be at the same angle. It is going to be some tricky work to get this “scabbing” to even out and look right. That is going to be my project for today…..install the rafters.

I was half way thorough this entry when I had to shut it down at 6:00 a.m. for the Friday walk at the University with Debbie. The campus is so beautiful. I remembered to take the camera. Following are some pictures as to how I started my day……

With it being Friday it was “coffee day” at the Starbucks on campus. We got there a little later than usual. It was so busy! There must have been complaints because the music was a wonderful soft Jazz, and the staff was friendly and nice! Rusty was in his spot over in an upholstered “lounge chair” in the corner. Debbi and I made his day! He always knows when it is Friday when we show up!

This is a view of "The Quad" at 7:00 a.m. on 3/23/2007 facing south east.


This is the Gorgas House on campus. It is one of the few structures of the original college to survive the destruction inflicted by Union forces in the last days of the "late unpleasantness".

Sunday, March 11, 2007

More Patio & Pergola Stuff

It has been a while since I have worked on this mess I call a blog. That last project doing the bedroom pretty much wiped me out for wanting to take on another project. Just trying to get the routine maintenance done in the yard here has been exhausting. Anyway...here is a continuation of the pergola project from last spring/summer.....

Working With Bricks
Saturday, May 20, 2006

Today is Saturday the 20th. It is time to take a break from the latest project and pound out a journal entry. Right now at 3:00 in the afternoon it is the hottest part of the day and all my shade is gone. I’m hot and grouchy and sick of this project. When these signs surface it is prudent to switch to another job…..

Since arriving home from the last excursion I have been working on the pergola/patio project. I’m getting burned out. Tuesday and Wednesday I cemented the border bricks along the tops of the forms I had poured. I have a fancy edged brick I used for this. Unfortunately, this brick still had cement that had to be chipped off the sides. This was Portland cement which was a real pain to remove. It is so much easier to remove the earlier types of mortars which are composed of just lime, sand and whatever. My arms, wrists and shoulders were aching from swinging that hammer and the shocks from the heavy iron chisel.

To cement these bricks in place on top of the cement form I purchased mortar in 10 pound bags. This stuff sets up real quick. I’m so slow in working with this compound: I don’t want to make a huge batch from the bigger bags and have it harden up before I’m done. After all that chipping cement off the bricks, now I have to mix this mortar crap up by hand. My aching body….at the end of the day nothing feels as good as a HOT shower. It is times like this I say “Screw the gas bills, I need this hot water!”

This project will use up all the remaining bricks from what I had salvaged years ago. I end up being about 120 bricks short. I take the easy way out and actually BUY new bricks from the builders supply. I decided that I will use these new bricks as an outline around the old salvaged brick. That way it will look more uniform. Although the new bricks don’t have the charm or history of the old bricks it sure is a lot easier to just have the bricks loaded into the truck and drive away. No demolition, chipping off mortar or stacking and restacking of the bricks.

I get four bags of sand as a start to set the bricks into their final resting spot in the patio. Once I get started I realize that I have to raise the crushed limestone base over ½ inch to have the bricks level with the border bricks on the form. Back out to Scottie’s for more crushed limestone. This stuff is a fraction of the price of sand.

Laying the bricks level is the worst part of the job. Because I’m using salvaged brick there is no uniform size. Each brick has to leveled as it is put down. The surfaces on these old bricks are not even making the job even more of a pain. Anyone who has read about my projects knows I’m not anal when it comes to this kind of thing. (RIGHT!)

The early morning is the best time for this job. It is so nice and cool, the birds are singing and my coffee is hot. As the day wears on the temperature rises as the sun travels higher in the sky. My shade disappears: by 1:30 I’m working in full sun. I can only do this for so long. After working with the bricks, level, trowel and crushed limestone since 6:30 in the morning it does not take much for an excuse to quit!

That is where I stand at this point in time. I have over half the patio bricks set out and leveled. The worst part is the center design using different street pavers. There are twelve pavers in this center design showing the manufacturer marks. It is almost an even split between Alabama and Ohio bricks. I had a bid on e-bay for three pavers from Kansas, but they ended up selling for over $40.00! That is WAY out of my price range. Here I thought I was being extravagant with a top offer of $5.00 a brick! It is hard to pay for something that you are used to getting for free!

Tonight the neighbors are having a “Sundowner”. Basically it is a get together of the neighborhood with drinks and snacks between five and seven. It is just down the street so I can just walk there.

Hopefully I will have the rest of the bricks leveled by tomorrow afternoon. Then I pour bags of “topping mix” over the whole mess and sweep this mixture between the cracks of the bricks. Mist this all down with the hose and the mix turns into cement which holds everything together.

Then I start on the next project…the new roof for the garage and tool shed addition.

Tuesday, February 13, 2007

More on the Pergola Project

It is pouring rain as I type this out. Following is a continuation of the pergola project that kept me so busy last year. In hindsight I can clear up a few details. Because this patio base was built facing into a slope, it had to be elevated. Because it was elevated, the side that would normally butt against the building was higher than the the cement slab foundation. Because of this, I designed this patio so it would be "freestanding". There is a space of about one foot between the side of the building and the patio.
I poured forms so the perimeter of the patio is a solid cement "wall" the width of a brick. This wall is then topped with bricks. More on that to follow. Here is the next step of the building process taken from my on-line journal.....

Low Key Monday
Tuesday, May 02, 2006

I’m getting burned out on this patio project. The worst is really over at this point. The concrete forms are all poured, now I need to fill this area with crushed limestone to make a base for the bricks. The clay/dirt base was tamped down and covered with landscape fabric. This fabric is held down with the limestone leftovers from the last project a couple years ago. This limestone had been stored on the driveway side of the house in some 20 plastic buckets that originally held kitty litter. That reminds me: back when I was working at a supermarket in Lancaster, PA. a customer asked Ronnie, (one of the stockboys) where the cat litter was located. Ronnie yelled down the aisle to John, “Hey John, what aisle is the shitty litter in?” This was totally inappropriate back in 1971, but we all laughed!

While working on all this, my package arrived with the latest E-bay purchase. When I redo the doors here in the house I replace the 1920’s door knobs and back plates with earlier styles. I have the styles of this house so mixed up and besides the older sets just look so much nicer. This box contains a set of door knobs and plates that match a set I already own. I’m very disappointed when I unpack the box. The merchandise is bright and shiny, it is definitely old but it does not feel right. The finish is rough. Whoever cleaned this either: sandblasted the pieces or brushed it all to death on a wire wheel. Not wanting to make a mess in the garage, I set up my buffing wheel outside. Now I go to town smoothing out the rough finish. What a difference some red rouge and a cloth wheel make.

As I was putting the tools away I had the camera in tow to document the progress of this project. That digital camera is so much fun! Stumpy was up to something. Sure enough; he was tormenting a poor little Gecko. After taking the picture (you can just barely see the little guy on the piece of wood) I put Stump in the house for a bit to give the Gecko time to find a new hiding spot!

Stump was pissed, he wanted to be outside. I turned him loose again and he went right to where his “friend” was. That cat was sniffing the grass and going crazy trying to find his new “buddy”. Mr. Gecko was smart and was nowhere to be found!

When I was last in New York (there is one more installment on that trip to go!) I purchased a copy of Brideshead Revisited by Evelyn Waugh. At the end of the day in my Morris Chair along with a glass of cheap box wine, I’m transported back to England of the 1920’s. Next to the early mornings, this is my favourite time of the day.

At nine it is now dark and time to round up the cats for the night. I can usually find them in Michelle’s driveway, right next door. Tonight is no exception. Daggy goes into the back study by herself. Stumpy, I have to track down and carry into the house growling. He is pissed a second time at having to return to the house. This is tempered when he gets his bowl of wet cat food as a reward for being a good cat!

Friday, February 9, 2007

Pergola Project 2006

I'm itching to do some outside work. The weather is not conducive for yard and outside house work yet. I've culled through my online journal and decided to post the pergola project that took up a great deal of my time last year. I'll do this over the next few days....enjoy!!!

When is Sunday??
Saturday, April 22, 2006

Things have been so crazy here: I have been so intent on getting caught up on my trip and all I have totally gotten mixed up on my days. This morning I go to the paper box on the corner to get a paper. Nothing so unusual about that: I put six quarters in the box for the Sunday paper and am outraged to pull out a Saturday paper. I’m all set to call the paper to give them Hell for not filling up the paper box with the right paper. The huge pan of home fries and onions are just about done as I’m fuming over the newspaper’s oversight. Then it slowly dawns on me, today is indeed SATURDAY!

How did I get to such a state? It’s a long story…… For a long time a major annoyance has been the mess located at the front of my workshop. This area has been a storage area for my brick horde and has been pretty much untouched for the past three years. It looks it. I have toyed with the idea of adding another patio in this area and even a pergola type enclosure. For the past few weeks I have been toying in my mind on constructing a simple pergola attaching it to the side workshop. Once that is up; it will be a simple task to brick in a patio.

Early Monday afternoon I head to Lowe’s for the first batch of lumber. It has been a while since I’ve purchased treated wood. Talk about sticker shock. The three 4”x4”x12’ and two 1”x6”x10’ was over $60.00. But with that lumber in my truck I HAVE to get started with the project.

The real pain is all the measurements that need to be done. The most important thing to remember in a backyard like mine is to keep things in proportion. The side of the shop this patio will be at is 16 foot wide. If the pergola extends about half that distance, it should be just about right. Using plumb bobs, squares, stakes and string the spot to dig the center post is located. It has been very dry for the past few weeks. The ground back here is hard as my heart. The soil seems to go in layers. The hard top layer is decent dirt which then goes to a layer of dirt and pea gravel. Under this is a light clay that is easy to dig out using the post hole digger. This hole goes to a depth of two and a half feet. Stakes and braces are installed to hold this first post exactly square and straight.

There are two bags of cement left over from the last patio project. This old stuff was a bear to mix. It took a lot of smashing with the back of the hoe to get it all thoroughly mixed. I’ll make sure I don’t have any bags of cement left over from this job!

Set this first post in cement and start working with the 1x6’s. I have to run a board across the side of the shop to attach the stringers to. I wish I had the foresight to plan this all out ahead of time. Instead, I just jump into a project and figure out solutions as I hit the problems. Get the side angles all cut and the board installed.

At this point I start the brick moving. All the bricks stored here have to be moved. I’m reminded of that poor guy in Greek Mythology who had to spend eternity rolling a boulder up a hill: only in my case I’m moving bricks!

Tuesday is spent installing the other two posts. This is such fussy work getting everything lined up and measured just right. Working alone makes this just that much of a longer job.

Wednesday after walking at the University with Debbi, I go on a lumber run. I end up with two 5/4 x 6 x 16 and ten 5/4 x 6 x 10. I’m into this mess now! I hate to move 16 foot lumber. It takes a lot of tying down to secure this safely in my truck bed. The back streets are my route home, no interstate with this load!

The miter saw is set up to chop the lengths right. Now this is where things get complicated. I learned that you don’t get burned out so quickly when you do a variety of different jobs. I had earlier made up a template for a fancy cut out for the ends of the boards. In between cutting the boards to length, I’m cutting out this fancy work with a saber saw. There are 14 cutouts that need to be done.

The first cross board is installed on the posts. It is at times like this I wish I had a helper. I can’t fathom how many times the ladder needed to be moved and that cross board adjusted to get it to the right height and level. All I know is I was beat by the time I was satisfied with the results.

Wednesday night I’m relaxing with Brideshead Revisited and a glass of box wine. At 8:30 I hear some yelling outside. A car is pulled into the insurance parking lot across the street. The engine is running, headlights on and door open. This young woman is screaming and shrieking at this surly thin boy. “I’m sorry, I f—ked up, It will never happen again.” Things continue in this vein for a while. The sulking boy tells this woman to not f--king touch him and tries to walk away. This woman is using her wiles crying and grasping at this boy. They walk around the block leaving the car running and abandoned for over half an hour. I want to tell this boy if he is smart he will run away from this as fast as he can. Finally they return. Was this resolved? Who knows and who cares? These kids and their drama!

Thursday is spent installing the rest of wood. I get a set routine down that makes this job a bit easier. With the wood all up I’m feeling pretty good. Now I move out the last of the bricks. It has been so hot, even with my do-rag my hair is driving me nuts. It has been a ages since I’ve let it grow so long. A trip to Northport barber shop is in order. Glens chair is empty as I walk in. I plop down and tell Glenn to “buzz it all off!” He laughs and asks if I want a number 2 or 1 ½ blade on the clipper. I take the 1 ½ blade and in no time I’m covered in my shorn hair. I can feel the breeze on the sides of my head. After trimming around my ears Glenn rubs the top of my head with the cool towel. It is such a great sensation.

After my haircut I drop into City Café for a vegetable plate. Martha is on so I get her going. I tell her I’m all upset after my experience at the barber shop. She immediately starts laughing. “What happened hon?” she asks. I tell her I went in the barber shop and told Glenn, “I want my hair to look like Buzz Alden the astronaut. Instead they buzzed it all off!” She laughs and tells me I’m such a mess!!

Friday I realize that if I’m ever going to remove the truck cap stored on the side of the workshop, it will have to be now. I used this truck cap when I was moving my stuff down from New York. I should have gotten rid of the thing years ago. After being in the same spot for years, it is buried under prickers, ivy, and small trees. I got cut up real good cutting this mess away. The cap is not heavy, just awkward to handle alone.

Once out in the open the ivy is pulled out from where it had grown between the inside supports. The thing is scrubbed down and hosed off. Next week I’ll get an ad in the paper to get rid of it.

I missed my workout at the Y on Wednesday, I won’t do that today. It is a black sky to the west as I’m walking. The weight and exercise areas are surrounded by large plate glass windows overlooking the street. I’m on the leg extension machine when the storm breaks. The trees are being blown sideways and lightning flashes light up the outside darkness. A transformer explodes and the lights go out. Shortly power is restored: by the time I’m finished with my workout it has stopped raining. The sky is still threatening on my way home. I get to thinking, were the cats outside when I left for the Y? I get the answer when I get to the front door, two wet cats run from underneath the truck parked in the driveway. They get dried off, and I get a nice hot shower!

That has pretty much been the story of my life for the past week. I think it explains a bit why my sense of time is all screwed up!

Friday, January 5, 2007

The Floor is Finally Finished


After much aggravation and waiting the finish finally dried on the floor. It kills me to have the heat turned up high to help speed up the drying time! The woodwork in this room/house was never meant to be natural. This is just cheap paint grade pine stuff. Originally I was just going to faux grain everything. But, the paint build up on this wood was so great it was easier to just strip it all off rather than put up with the brittle built up paint chipping off constantly.

Saturday I was FINALLY able to get the floor finished. I put down the rug and clean the bejesus out of it. Then the bed gets set up. Finally things are coming together. When I was living in Bowling Green I purchased the greatest oak wall clock. Mission style, the top is a long shelf with a groove to set plates in. There were problems with the thing, but the price was right at a close out for $35.00!!! I had no idea where to put the thing when I bought it, but I had to at that price! Now I realize; it will go perfect behind the bed! The rest of the day was finished out in this fashion, arranging pictures on the walls, moving in the computer armoire and installing the computer. All that wiring drives me crazy! I have my Saturdays planned out around the CBC 2 broadcasts. I had to keep the computer hooked up so I could listen to the Vinyl Café that comes on at noon Eastern Time. http://www.cbc.ca/vinylcafe/ I know I’ve written about this program before. It is so low key and human. I think the word civilized can be used to describe it. I always get homesick for Lockport and my friends in Canada when I listen to this. For the record; as I’m typing this, the program “Music For Awhile” from the CBC is playing on my computer! My life sure has changed since getting that high speed connection!


All the while I was working little Daggy was on hand. She is resting on the register grate that was in the kitchen of the house I grew up in. I used to stand on it on winter mornings to get my feet warm. That old iron top held many wet mittens to dry. This is just another example of the stories behind some of the most mundane things I have!


Sunday, December 3, 2006

Drying Time...

Well I got the first coat of the floor finish steel wooled down smooth and the second coat of finish applied on Saturday. It dried a LOT better than that first coat. Just got it steelwooed down and will apply the third coat of finish tonight. It has warmed up a bit so I am going to move the outside plants into the workshop to give them a chance to survive the winter!
I just copied an earlier entry from my on-line journal that detalis this projcet from the beginning....

Prepwork and Wallpaper
Monday, November 06, 2006

There has been so much going on as of late. Last Wednesday morning I ordered a new flat screen monitor for the computer. I just missed the rebate offer that took $100.00 of the list price for the month of October. I was right in my hunch this rebate would be extended. It was!!! I was still able to save a bunch! Here is where I get my mind blown away…the doorbell rang before 9:00 a.m. Friday. It was the monitor being delivered…less than two days after placing my order! The deliveryman was so funny. After handing me the monitor he stood there sniffing…. “I smell bacon!” he says. I laugh and tell him that I had just finished up breakfast: three slices of bacon, two eggs, raisin toast, orange juice and coffee!! He just smiled and said how good it all smelled!

I’m amazed at the clarity of the screen on this new monitor. After using that tiny 15” screen for the past three and a half years, the new 19” screen seems HUGE!

Work on the back room has been going slowly. I’ve gotten burned out, but I want to have it and the house put back together before the holidays. There will not be a faux bamboo washstand in the near future to put back there. I was able to follow the auction on line for the stand I was interested in. I had left what I thought was an outrageously high bid considering the condition of the piece. I was floored to see it sell for nearly DOUBLE that bid at $2,750. That price is before the sales tax and 10% buyers premium is even tacked on. That is way out of my league!!

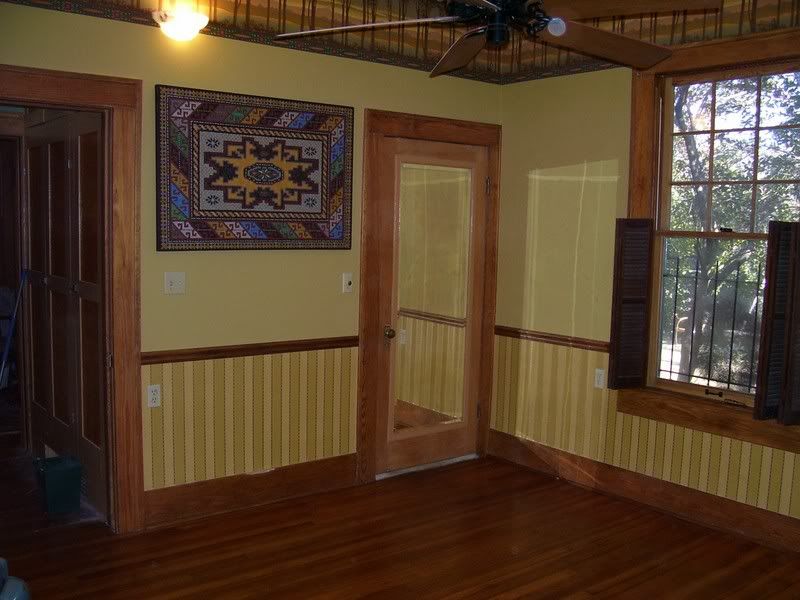
Sunday I pretty much finished up on the walls. Next is filling the “nail dimples” and raised paper seams on the ceiling. The ceiling fan has had a wobble that has driven me nuts since its installation. I have spent hours playing around with weights to try and get the blades balanced. I was able to correct a lot of the problem, but never to my satisfaction. I need to remove the fan blades in order to do the ceiling work. This will be a perfect time to weigh out the blades and get each one to the exact weight. Only problem is, I don’t have a scale. The perfect solution will be to go to the post office and use the digital scale in the self serve set up for weighing envelopes and small packages. There will not be anyone around on a Sunday afternoon. I was so annoyed to enter the post office lobby carrying the fan blades, weights, and other things to find the scales are gone. I’m finally going to have to break down and get a scale of my own. Selling junk again on E-Bay I do need a scale for estimating shipping costs.

Working on the full ceiling means I had to take the bed down. It is such an ordeal, the dust bunnies were everywhere! Advertisements 100 years ago for iron and brass beds placed great emphasis on how much easier they were to maintain and keep clean. The wide wooden side rails on the bed frame harbor a ton of dust and lint. I know I really don’t pay attention to that kind of thing till I’m forced to take some kind of action and then I’m horrified!

I set up sleeping in the den on the sofa. It is not roomy as I’d like, but it sure is a lot easier and safer than trying to navigate the cluttered stairway to the spare bedroom upstairs! The computer is also in this back room. The cats and I enjoyed listening to Jack Benny radio programs before bed! I found a fantastic site with a bunch of programs you can listen to for free!!! Jack Benny Programs

I had been playing with wallpaper and color samples all weekend getting just the right combination picked out. I made up my mind I was going to order the paper today. (Monday) Stumpy was such a help as usual during all this!


I was all set to give Bradbury and Bradbury http://www.bradbury.com/index.html a call when the morning mail was delivered. There was an envelope from Bradbury and Bradbury! I did not have any samples on order: sure enough, here was samples of their new freize paper I have never seen. It is perfect for this room. Now I have to change everything around again! Talk about timing!

The "Rookwood Frieze" on the left is the new choice now over the center paper and border. the brown of the trees seem to bring out the natural woodwork and the muted colors seem more appropriate for a bedroom. Now I have to determine what paper will go below the chair rail, and paint color for the "middle" section.


Well, it is time to post this and get to the Y for my workout….