Sunday, December 3, 2006

Drying Time...

Well I got the first coat of the floor finish steel wooled down smooth and the second coat of finish applied on Saturday. It dried a LOT better than that first coat. Just got it steelwooed down and will apply the third coat of finish tonight. It has warmed up a bit so I am going to move the outside plants into the workshop to give them a chance to survive the winter!
I just copied an earlier entry from my on-line journal that detalis this projcet from the beginning....

Prepwork and Wallpaper
Monday, November 06, 2006

There has been so much going on as of late. Last Wednesday morning I ordered a new flat screen monitor for the computer. I just missed the rebate offer that took $100.00 of the list price for the month of October. I was right in my hunch this rebate would be extended. It was!!! I was still able to save a bunch! Here is where I get my mind blown away…the doorbell rang before 9:00 a.m. Friday. It was the monitor being delivered…less than two days after placing my order! The deliveryman was so funny. After handing me the monitor he stood there sniffing…. “I smell bacon!” he says. I laugh and tell him that I had just finished up breakfast: three slices of bacon, two eggs, raisin toast, orange juice and coffee!! He just smiled and said how good it all smelled!

I’m amazed at the clarity of the screen on this new monitor. After using that tiny 15” screen for the past three and a half years, the new 19” screen seems HUGE!

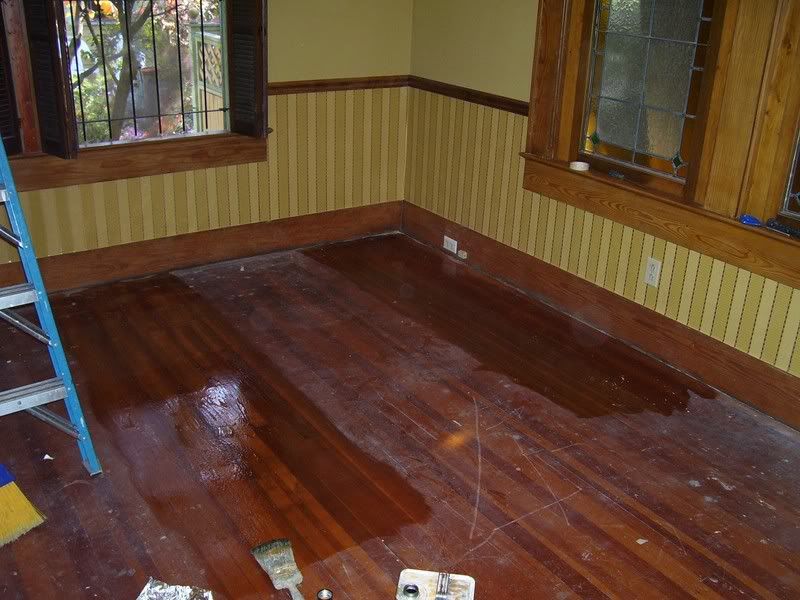
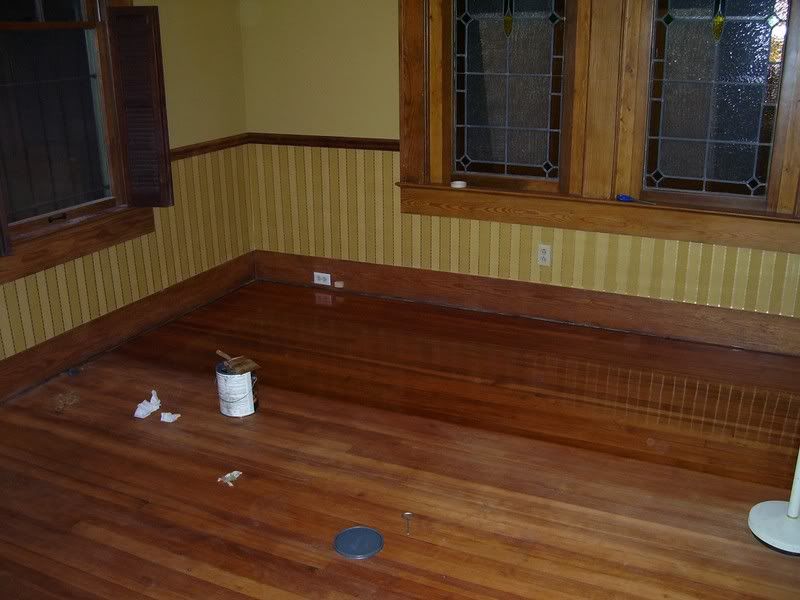
Work on the back room has been going slowly. I’ve gotten burned out, but I want to have it and the house put back together before the holidays. There will not be a faux bamboo washstand in the near future to put back there. I was able to follow the auction on line for the stand I was interested in. I had left what I thought was an outrageously high bid considering the condition of the piece. I was floored to see it sell for nearly DOUBLE that bid at $2,750. That price is before the sales tax and 10% buyers premium is even tacked on. That is way out of my league!!

Sunday I pretty much finished up on the walls. Next is filling the “nail dimples” and raised paper seams on the ceiling. The ceiling fan has had a wobble that has driven me nuts since its installation. I have spent hours playing around with weights to try and get the blades balanced. I was able to correct a lot of the problem, but never to my satisfaction. I need to remove the fan blades in order to do the ceiling work. This will be a perfect time to weigh out the blades and get each one to the exact weight. Only problem is, I don’t have a scale. The perfect solution will be to go to the post office and use the digital scale in the self serve set up for weighing envelopes and small packages. There will not be anyone around on a Sunday afternoon. I was so annoyed to enter the post office lobby carrying the fan blades, weights, and other things to find the scales are gone. I’m finally going to have to break down and get a scale of my own. Selling junk again on E-Bay I do need a scale for estimating shipping costs.

Working on the full ceiling means I had to take the bed down. It is such an ordeal, the dust bunnies were everywhere! Advertisements 100 years ago for iron and brass beds placed great emphasis on how much easier they were to maintain and keep clean. The wide wooden side rails on the bed frame harbor a ton of dust and lint. I know I really don’t pay attention to that kind of thing till I’m forced to take some kind of action and then I’m horrified!

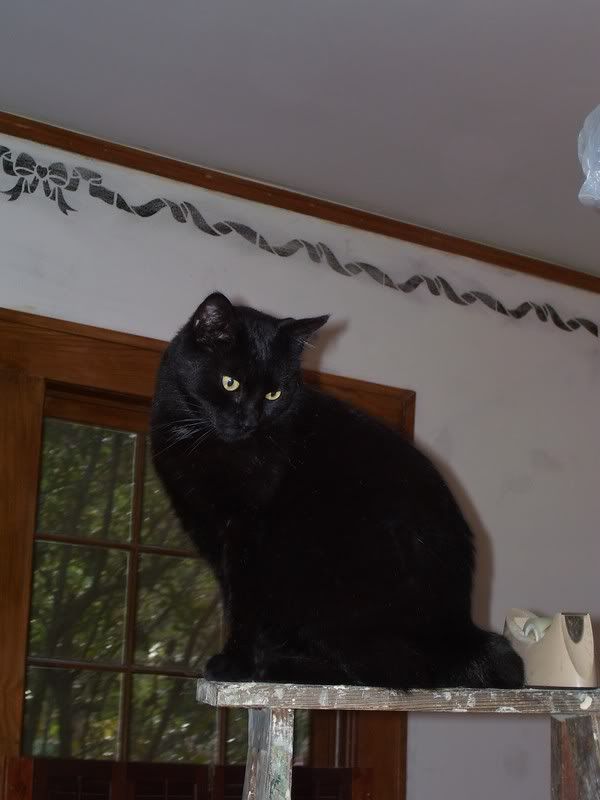
I set up sleeping in the den on the sofa. It is not roomy as I’d like, but it sure is a lot easier and safer than trying to navigate the cluttered stairway to the spare bedroom upstairs! The computer is also in this back room. The cats and I enjoyed listening to Jack Benny radio programs before bed! I found a fantastic site with a bunch of programs you can listen to for free!!! Jack Benny Programs

I had been playing with wallpaper and color samples all weekend getting just the right combination picked out. I made up my mind I was going to order the paper today. (Monday) Stumpy was such a help as usual during all this!


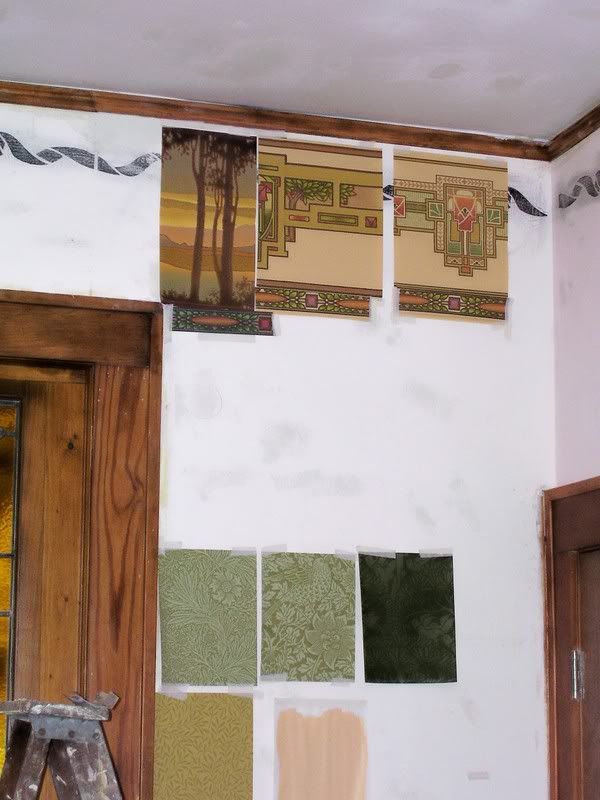
I was all set to give Bradbury and Bradbury http://www.bradbury.com/index.html a call when the morning mail was delivered. There was an envelope from Bradbury and Bradbury! I did not have any samples on order: sure enough, here was samples of their new freize paper I have never seen. It is perfect for this room. Now I have to change everything around again! Talk about timing!

The "Rookwood Frieze" on the left is the new choice now over the center paper and border. the brown of the trees seem to bring out the natural woodwork and the muted colors seem more appropriate for a bedroom. Now I have to determine what paper will go below the chair rail, and paint color for the "middle" section.


Well, it is time to post this and get to the Y for my workout….

Friday, December 1, 2006

Interesting Problem

In my last post I detailed how I stripped down an old pine floor and finished that post with applying the first coat of finish. I had hoped that by now I'd be happily reporting things went according to plan and I had just put down the third and last coat of finish. No such luck! It has been very warm here for the past week. That is nice for having the doors and windows open, but the high humidity did not help that first coat of finish dry.
Normally the finish will dry overnight. It has been over two days now and that first coat of finish is still tacky in spots. Close examination of the floor revealed the first half of the floor I striped with the Crown Stripper dried hard and even. The second half of the floor that I stripped with the Strypeeze dried blotchy and is still tacky in spots. Could that stripper have left something on the wood to retard the finish curing? The entire floor was cleaned down with mineral spirits to remove any remaing residue. It is only the Strypeeze section of the floor that has problems......
I just turned on the furnace to see if that will help speed up the drying...I'll give that section another day to dry. At least I'll be able to steel wool down the dried section of the floor today.
It is problems like this that make these projects "interesting".
To be continued.....

Wednesday, November 29, 2006

Refinishing a pine floor...

I Am Floored!!!
Wednesday, November 29, 2006

Finally time to do an entry. With the wallpapering done, it was time to start on refinishing the pine floor. It is all too typical to bring in a floor company to sand floors down when they need refinishing. Unfortunately, old tongue and groove floors can only be sanded so many times. It is the finish that is shabby, not the wood itself. The small dings and scratches in the wood I can live with…they add to the character. My technique to redo these old floors is just like refinishing a piece of furniture. This is a labor intensive job that I have done too much of. If anything, previous experience has taken away a lot of the surprises that pop up during the job. The weather is holding so I can have the doors and windows open to air out the nasty paint stripper fumes. It is on Monday morning November 27, 2006 I begin this chore.

I have two full gallons of paint stripper which should be enough. Lowe’s recently brought back Savogran Strypeeze paint stripper. This is stuff I have been using for over 40 years. They are always out of this stripper, which to me proves its superiority. I have a one gallon of this brand (the last one on the shelf!)and one gallon of another brand stripper called Crown. The Crown brand stripper is what I start the floor with.

I “divide” the floor into sections about ten boards wide and 8 foot long. The first section has stripper applied. Then a second section has stripper applied. These sections are usually on each side of me, leaving a center section I can maneuver from. The new gel knee pads make such a difference doing this. It is like Louis always said: “Be nice to your knees, you will miss them when they are gone!”


The first area to receive stripper pass has the goop removed with a wide bladed putty knife. This mess is deposited into a plastic shopping bag. More stripper is applied to this scraped off area, and the goop is removed from the second area. When that is removed more stripper is applied.


Now I go back to the first area and sprinkle sawdust over the wet striper. The sawdust soaks up the excess striper and helps to amalgamate all the mess together when I rub it off with coarse steel wool. By doing this the steel wool does not fill up with gunk so fast greatly cutting down on the steel wool used. Once this is cleaned down to the bare wood, paint stripper is again applied to a fresh area of flooring.


This is a lot like working in the factory…you divide the job into steps and just work in a circle. I have never stripped a floor using this paint remover; it is not easy to work with. To get the entire residue removed from the wood is very time consuming. After nearly eight hours I only have half the floor stripped. That area used up the entire gallon of Crown Stripper….I’ll see how the Strypeeze works tomorrow.

Early Tuesday morning I’m back with my paint scrapers, putty knives, steel wool and stripper. The Strypeeze paint stripper works just like I remember: Fast and efficient. It is so easy to clean up compared to the other stuff. It is so much faster; I have this second part of the floor done in less than four hours and I only used half the amount of steel wool that I used for the first half.

The entire floor is cleaned down with mineral spirits to remove any remaining stripper. Again, today is a glorious sunny warm day. The fan in the window sucks out the nasty fumes. I have all afternoon for the floor to dry while I do much needed yard work.

Tuesday night the first coat of polyurethane is applied. Personally I prefer to use an oil finish: It leaves a beautiful sheen. It does not wear well in high traffic areas, but it is easy to touch up. The last time the floors in this house were sanded they were never finished off with a fine grit sanding paper for a nice smooth finish. I can feel the small grooves in the wood left from the sandpaper that was used. To get a really nice sheen from an oil finish the floor has to be really smooth. There is not enough body in the oil finish to fill the tiny grooves giving you a dull and lifeless finish.


To be continued…..

Monday, November 20, 2006

A Plumbing Story From 2005

Another Plumbing Nightmare
Tuesday, October 25, 2005

Friday I decide to take it easy on my bathroom restoration and do the “simple job” of changing out the faucet set for the bathtub. This tub is not a “claw foot” but some form of early built in unit. It still uses the hardware an earlier type of tub would use. I have seen ads for this particular model in my 1928 Home Builders Catalogue. The supply pipes are all exposed; this should be an easy job. Famous last words…….

My original plan is to just remove the existing faucet assembly, and replace it with a new faucet that I had bought years ago on sale at Historic House Parts located in Rochester, NY. All the connections are identical; I can use the existing supply pipes. The hot water supply separates easily enough. I don’t see any of the usual compression gaskets, just the remnants of fossilized string. This is not a good sign. The cold water connection will not separate no matter what I do. I am going to have to remove the water supply pipe and remove the entire mess. Normally this would be an easy job. In my case, when the bathroom was redone years ago the copper pipe fittings the tub supplys to attach to were cemented into the tile floor. The threads of the fittings are all that peep above the floor tile. The compression nut is removed and I try to remove the supply pipe. Again I feel like I’m in a Three Stooges short. There is about a foot of supply pipe shoved into the water line wound up with more string. By the time I get this supply line separated from the main pipe it is destroyed. Now the fun starts.

The supply pipes I need are not standard Homo Depot items that are carried in stock. It would take a week to special order the beasts if they even had them. I try the plumbing supply place not far from my house. I’m in luck; they have a set for $25.00. This is a “universal” set that can cover many different faucet sizes by using different gaskets and compression nuts. I get the right gasket and compression nut to get a rough fit. The new compression nut does not have the same thread pitch to match the new faucet set. The old compression nuts will fit the new set, so I will use them. There is only one problem: on the new supply pipes, a shoulder is attached for the gasket to fit against. The compression nut fits against the other side of this shoulder. When you tighten the compression nut to the faucet, this makes for a watertight seal. The openings in the old compression nuts are too large to accurately fit the shoulders on the new supply pipes,

If I was annoyed before, I’m really pissed now. It would be impossible to find the right compression nuts anywhere. There are no water shutoffs for the bathtub: The main shut-off valve has my house without running water. I must get this mess taken care of today.

This is where my watchmaking training comes into play. If I can make an insert to fit tight against the shoulder and fit snug into the compression nut that should work. Sorting through my washer assortment I find a pretty close fit. Using a large “vise grip” to hold the washers steady, I drill out the inside hole of the washers. Then using the file I file down the outside washer diameters to make a tight fit into the compression nuts. This should work.

There are a series of bends in the supply pipe that must be made to get the pipe to line up to the faucets and main water fittings. This is so much easier said than done. That is the main reason I wanted to reuse the original supply pipes. There is a tool I use to bend up this supply pipe that slides over the pipe when putting in bends. It stops the pipe from kinking. After a lot of aggravation and cuss words I get the pipes all bent up.

Thank God the pipe fittings hold tight in the cement so I can get the new compression fittings watertight.

Testing the new faucets, I find water is leaking out of the cold water handle. Here we go again: After much fussing this problem is remedied. So long as no water is leaking out when the faucets are off is all I should really worry about. I can’t remember the last time I used this bathtub for bathing. Since I installed my outside shower, that is pretty much all I ever use. I guess it is just my obsessive-compulsive tendencies showing through!

My First Post

This will be my first blog post here. I have been keeping an online journal for many years: this will be reserved for my house restoration stories. Believe me I have a lot of them. I have been restoring this bungalow home in Alabama for the past eight years. I plan on culling old stories from the past two years of my journal as well as chronicling the new projects as they unfold.
For the record: Bricks are a big part of my life, hence the title of this blog....