Sunday, November 23, 2014

Fighting Ebola: "DON'T SPIT ON SIDEWALK"

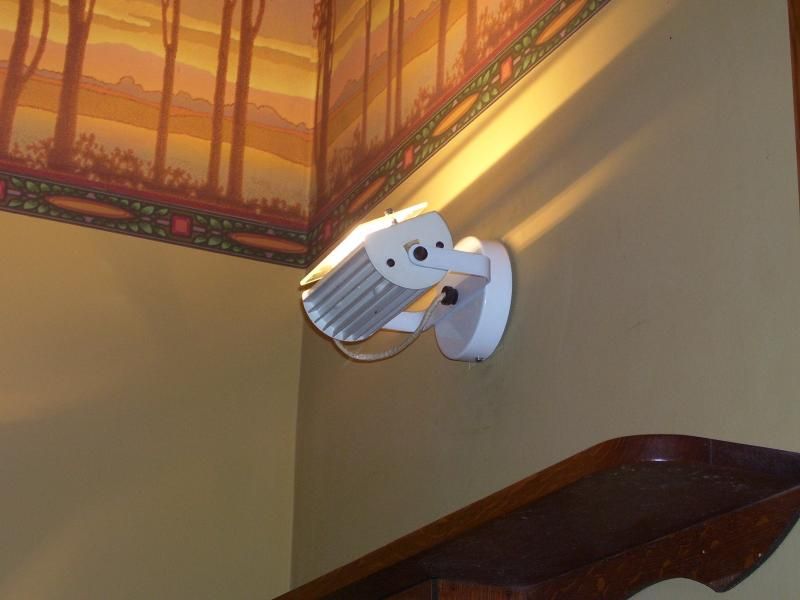
It looks to be another gray rainy Sunday. At least the temperatures are warmer. Katie stopped over Saturday morning and we walked along the river to the new University Boat house. They were having an open house for alumni rowers and guests. Katie rowed for the crew, and I know many of the coaches. What a facility. I wish I had taken my camera. It was still cool enough I did not wear my new camo Utilikilt. I was still “beat up” from Fridays “public service project”.
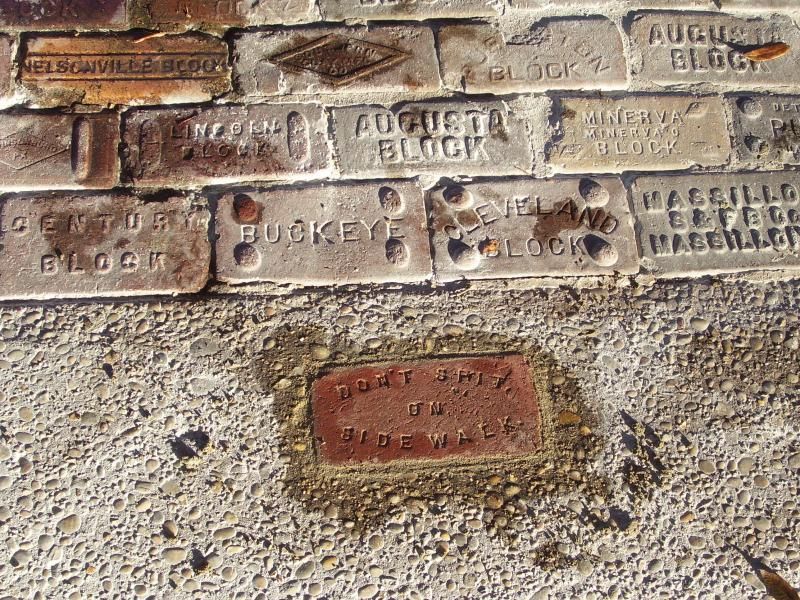
After getting my halogen wall light fixed up I decided to tackle another project that had been on the back burner for a long time. I’d been joking about installing my “Don’t Spit on Sidewalk” brick into the sidewalk in front of my house for a while. I reasoned it would be my effort to help stop Ebola! The sun was brilliant and the temperatures were warm on Friday. It was time to get the show on the road.
I owe it to my friend Ed for getting me addicted to my angle grinder! He taught me the “in’s and out’s” of how “big boy power tools” can make miserable jobs so much easier. I have to say the brick saw and angle grinder have had such an impact upon my life as to be scary!
I knew this was going to be a real pain in the butt job. The old sidewalk I was cutting into has a lot of gravel mixed it which makes it nearly impossible to drill into, and slow cutting with the diamond wheel. I think bullets will be the best way to outline this project.
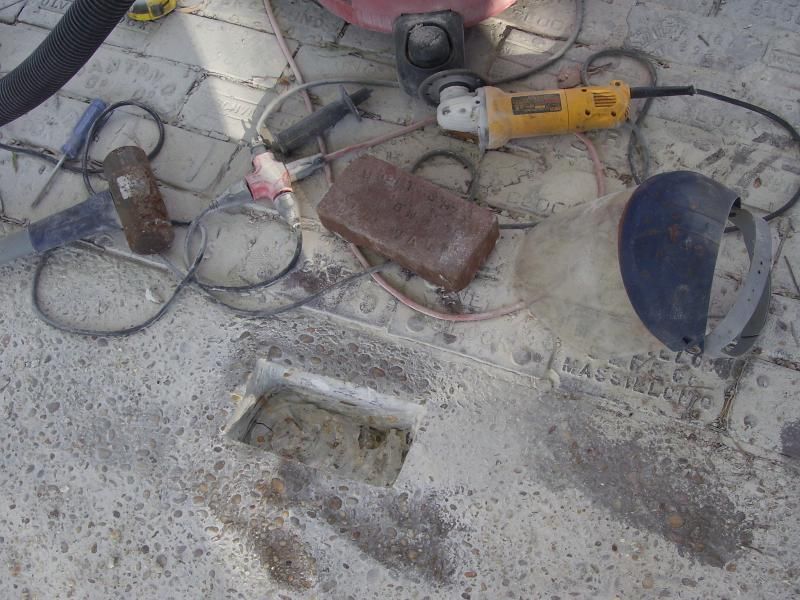
  • The brick was laid out and the new location was marked upon the sidewalk.
  • Using the diamond carbide drill bit each of the four corners was drilled out a bit. The bit would not go too deep because of all the gravel.
  • The outline was first cut into the sidewalk. Starting on the north side of this cut out, the inside was scored into small sections and chiseled out with a steel chisel and sledge hammer. This starting area was the worst as there was so little area to work in. Ever so slowly the first half of the opening got cleaned out.
  • With more room to work with the second half was cut out much easier and faster. All the while I was working in a cloud of dust and playing John Henry with the chisel and sledge hammer, the game day party was being set up across the street. I could just imagine what the people were thinking of the commotion going on!
  • My poor 4”diamond wheel was toast by the time I was doing the final fitting. This entailed making a duct tape sling to hold the brick to lower and raise it from the opening for the process of cleaning out the corners. With the initial space cleaned out this went amazingly quick.

Cleaning up the edges before the final installation:
http://i293.photobucket.com/albums/mm80/brick1101/001-149.jpg
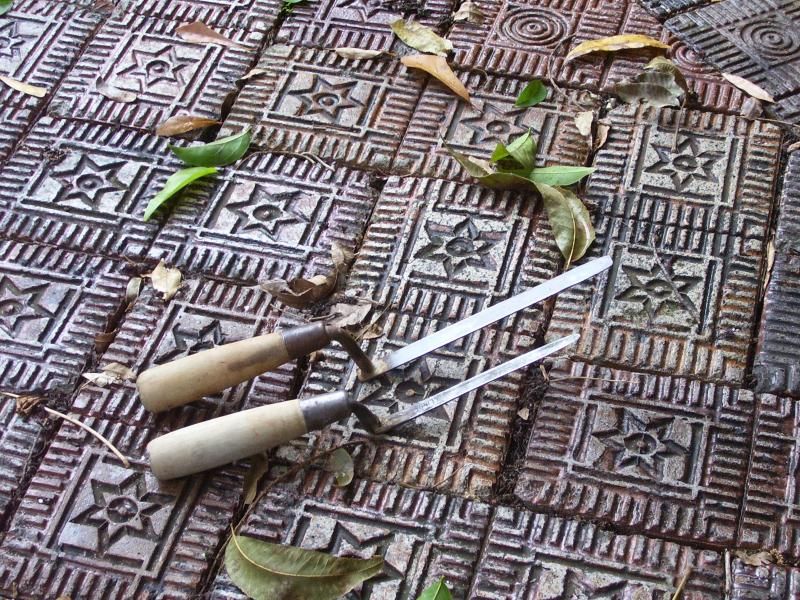
A small batch of mortar was mixed up and the brick was tapped into place with the rubber mallet. Ed’s dad was an expert bricklayer. Ed gave me bunch of his dad’s mason tools. These “jointers” have been invaluable to me these past few brick projects. What difference having the right tools makes. I used these jointer tools to pack and clean the side mortar joints.
Jointer tools: 
http://i293.photobucket.com/albums/mm80/brick1101/masonjointer.jpg
Finished installation:
http://i293.photobucket.com/albums/mm80/brick1101/sidewalkbrick.jpg
I was asked to post a picture of my “granny square”. I documented the origin and progress of this 10 years ago at Open Diary. This poor “granny square” started out as a joke in the skill center at work which eventually took on a life of its own. Coworkers would bring me leftover yarn from their projects. When it would be time to start another round a vote would be taken of whoever was in the skill center as to what the colour should be! It can make you dizzy to look at it too long! There are 86 rounds on this. I crochet very tight so this works out to a lot of yarn. The thing weighs a ton! I still add to it when the fancy hits.
http://i293.photobucket.com/albums/mm80/brick1101/grannysquare.jpg
Stumpy just came in from outside. He made the rounds around my house and Michele’s house next door so he is ready for a break. He is now on my lap getting pets and rubs. He is purring his heart out. Things are good…..
http://i293.photobucket.com/albums/mm80/brick1101/003-101.jpg

Friday, November 21, 2014

Back After A Long Absence

The Internet and computer software are so transient. Time is flying by so. My good friend Graham asked if I would copy an old LP to CD for him. It has been quite a while since doing this. It was in April 2010 my old desk top tower died after seven years of service. The information and files on old hard drive was salvaged/saved. A new tower was purchased which was an upgrade from Windows XP to Windows 7.
The last few copies made from my turntable I’m certain were through Realplayer. Well, the free Realplayer program has changed to where I don’t have that option anymore. The “Pyro” software to translate the analog LP to digital I downloaded when hooking up the turntable, was not in my programmes file anymore.
I pulled out the disc and reinstalled it. It would not run. Using Google search I learned this old programme is not compatible with Windows 7. The turntable I have from Audio Technica is no longer supported by anything because it does not use a UBC port like the current models. I think I found a work around but it involves a lot of downloads and consolidating programme files and locations. It looks to be hours of work to accomplish. ARRRRG!!!!
This morning I was curled up snug and warm under the wool blankets floating between being asleep and awake. For whatever reason I was thinking of the old house restoration blog I started years ago. It has been dormant for years. My last entry was in April 2011.
I started this blog back in 2006 in the days when a lot of “old house action” was happening on the Internet. There was a thriving old house site with an informative discussion forum. An off-shoot of that site was a separate site for old house blogs. It was sort of a “web ring”. Just typing that out has it sounding like ancient history. That collection of blogs was very disjointed and eventually faded away.
The old house site and forum deteriorated as the years passed. I posted less and less. The owners of the site pretty much ignored it and it was over run with spam. Things got to be so bad I did not want to have any postings to tie me to that site. Last year I went through and deleted all my posts. Mercifully only a few were “locked” to editing so there is hardly any footprint of me ever being there.
It seems to be an “on line” pattern as the forum on that old house site ended up being controlled by a few “experts” doling out misinformation. I have witnessed this happen on various antique phonograph boards. I don’t like being involved in conflict if I can avoid it. I’ll read these forums, but refuse to join or participate. I really try and hold my tongue on Facebook. That site could have me crazy if I took it seriously.
I’m thinking this might be how the Internet is evolving. I was on an old archived site recently that spelled out the rules and etiquette on how to navigate and behave in chat rooms. Looking back now on AOL Chat Rooms makes them seem primitive and quaint. Do chat rooms even exist anymore? Facebook and Twitter seem to have pretty much killed them off.
To return to my old house blog: I’m going to start posting to it again. Instead of doing chronological entries of projects in progress, I plan on pulling out and consolidating entries going back to my earliest “Open Diary” years so I can have a document of the progress and work done here. I could almost write a book on the stories and adventures behind the bricks I salvaged from the burned out train station 30+ years ago.
It is supposed to warm up today.
Arrh!!! I did the entry up on the laptop in the kitchen. I attach the word file to a Google mail draft which I then open on the desk top to do the fine tuning and posting. The bedroom has been pretty dark as the halogen wall light was out again. I was expecting that to happen the last time I worked on it. I did not want to work in the dark so I took the damn thing off the wall and tore into it.
Just as I expected one of the wires burned through. The halogen bulb emits such heat the inside the casing the wiring must be special high temperature stuff like what is used in ovens.
I was planning on going to the appliance repair store to see if I could get wire from them. I found a source on E-bay for small lengths, but I’d rather get it locally if possible.
This light is first generation and naturally not in production anymore. When this style lighting first hit the market it was VERY expensive and only sold in designer shops. This was purchased in the late 1980’s from a specialty light store on 8th Ave in NYC. I know I have this all documented in my paper journals, but it would take all day to find the information. Ron and I would shop there on our frequent trips to the city. Having this wall fixture up-lighting 300 watts, I can comfortably light half the room without table or floor lights.
Once I tore into the thing I discovered the wire burned off right at the porcelain. There was no easy way to repair it. To condense a lot of aggravation, I remembered I had an old halogen torchiere lamp from when I lived in Bowling Green.
I bought as a close out from K-Mart Labor Day 2004. I can understand why they stopped making this style light. There were more parts tacked onto this lamp. It had a glass cover for the bulb, and a wire cage over the entire top of the light. I now realize there was also a thermostat to break the current if there was excessive heat build up.
It worked fine the time I lived in Bowling Green, KY. Here in Tuscaloosa I used it for a work light under the carport. It quit working years ago. It was cheap enough I never attempted to fix it, but hung on to it for parts. I was able to take the bulb holder out and switch it out with the holder of my old fixture. It had more than enough of the high temperature wire to do the job.
Once again in my life it was, “NEVER BUY NEW, MEND AND MAKE DO!!!
http://i293.photobucket.com/albums/mm80/brick1101/halogenwalllight.jpg